Gumstix
Contents
Boards

Motherboards
Expansions
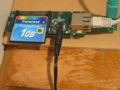
- netCF-vx : Combines ethernet with compact flash
- Roboaudiostix : Combines the function of the Robostix and the Audiostix, sacrificing only convenient location of various things.
- Robostix : AVR board with sensor input, motor control, PWM, GPIO, etc.
- Tweener : Converts one TTL serial line to RS232 and grants access via an 8 pin mini-din connector.
Support Hardware
Setup
Getting Started
- Make Modifications to Tweener. Make sure the cut the trace closest to the 60-pin connector as shown in the picture.
- If you'll be mounting from top down, start with the netCF-vx or if from the bottom, up, start with the Roboaudiostix
- Between 60-pin connections, use 3mm spacers. Between 120-pin connections, use 2mm spacers.
Serial Config
Linux Build Environment
To create a build environment on the gumstix, I used the following steps:
First, we get the tools and source we need:
 $ apt-get install build-essential subversion bitbake
 $ mkdir ~/gumstix
 $ cd ~/gumstix
 $ svn co https://gumstix.svn.sourceforge.net/svnroot/gumstix/trunk gumstix-oe
Next, Ubuntu uses /bin/dash instead of /bin/bash. If you are running Ubuntu, use the following command:
$ sudo dpkg-reconfigure dash
And select bash
Next, we update our profile to set up a sane environment for bitbake:
$ cat gumstix-oe/extras/profile >> ~/.bashrc
The following two lines are optional.
The first is how many threads (jobs) to use for compiling. This is usually your number of cores plus one. So for a two core system, select -j3"
$ echo export PARALLEL_MAKE="-j3" >> ~/.bashrc
The second is how many bitbake actions you wish to perform simultaneously. This allows downloading and compiling to happen simultaneously. Setting it to 3 is about all that is needed. Less serializes everything, more just allows you to download more thins simultaneously which doesn't seem all that useful:
$ echo export BB_NUMBER_THREADS=3 >> ~/.bashrc
Lastly, if you'd like to change the defaults or see what is actually being done to you profile, go ahead and take a peak, and make changes if you like. Using your favourite editor, edit ~/.bashrc
Then, load your new profile:
$ source ~/.bashrc
Next, we continue to build our environment. The following sets up the directories bitbake expects by default:
 $ sudo groupadd oe
 $ sudo usermod -a -G oe your_username
 $ sudo mkdir /usr/share/sources
 $ sudo chgrp oe /usr/share/sources
 $ sudo chmod 0775 /usr/share/sources
 $ sudo chmod ug+s /usr/share/sources
Next, use your favourite editor to make the following file: ~/gumstix-oe/user.collection/packages/images/gumstix-fro-image.bb
Or what ever you want to call it. Then populate this file with the following content:
 # Fro's build environment gumstix image

 # This line sets the dependencies.  Here we are setting the basic gumstix image
 # as the basis for ours.  This prevents us from having to care about all the
 # packages required to get a gumstix board up and running.
 require ${GUMSTIXTOP}/com.gumstix.collection/packages/images/gumstix-basic-image.bb

 # Update this number with every rebuild.  This tells bitbake that there has been
 # a significant change and to reconsider all aspects of this package.
 PR="r8"

 # Here is where we tell bitbake what to build on top of our dependencies.
 IMAGE_INSTALL += "glibc-localedata-en-us glibc-gconv-ansi-x3.110 screen gcc make \
 autoconf automake ckermit minicom perl tcl vim rsync bitbake \
 glibc-charmap-ansi-x3.110-1983 glibc-utils glibc-extra-nss glibc-dbg \
 glibc-pcprofile binutils pkgconfig libtool m4 python gdb strace \
 linux-libc-headers-dev gcc-symlinks binutils-symlinks diffutils libc6-dev \
 pkgconfig ncurses-dev"
Finally, run bitbake
$ bitbake gumstix-fro-image
Here, bitbake may throw tons of errors about missing commands and build tools. Ubuntu has them all, so just install them and try again.
Gotchas
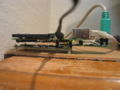
- Screw kits don't include enough risers or long enough screws to mount the entire stack securely. I bought three screw kits thinking I'd have enough but I quickly ran out of risers. I bought one inch 0-80 screws from Olander in Sunnyvale and they were tall enough to mount the entire stack on 1/4" acrylic.
- Tweener power input interferes with netCF-vx, but can be removed
- The Roboaudiostix does not have an onboard power connector. Normally, Robostix, which do have power connectors, are powered and then provide power to the rest of the stack. This is because their ideal voltage for all Robostix is 5.5v (though they can accept 3v-9v) and the Gumstix only provides 3.3v. The Robostix do provide 3.3v to the stack. The logic on the Roboaudiostix will work when power is provided by the Gumstix but it should not be expected to perform any of it's roboty goodness. This means that power should be delivered directly to the Roboaudiostix. This, however, is not important when just getting started.
- Only two mounting holes are universal to all Gumstix boards as evident by this picture
Stack with One Inch Screws / Tweener Power Clearence
Two universal mounting holes, shown thread up


Progress
05/22/08 - Got Stix - Got net setup - Got ssh
05/23/08 - Got Screws - Mounted Hardware - Built new disk image
05/24/08 - Started Wiki (Stuck at family's)
06/02/08 - Mailed 400MHz back
06/12/08 - Gumstix sent me 600MHz
06/16/08 - Received 600MHz
06/16/08 - 06/27/08 - Worked on getting the build environment working.